Wednesday, October 28, 2009

Winter Dream in Camo

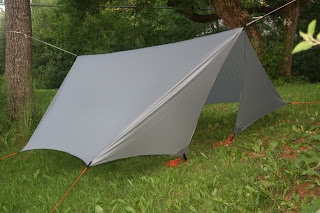
Here's a few pics of a recent special order I was able to do.  Unfortunately, I have not found a consistent source of this material or anything comparable (the place I got this is completely out of it).  It's 1.1oz ripstop with a very thin waterproof coating - finished weight is actually less than silnylon. It's easy to find heavy camo ripstop, but ultralight stuff has been a rare find so far.


Thursday, October 15, 2009

Four Season Cat-cut Tarp


Just wanted to post a couple pictures of the latest Four Season tarp. I was able to snap a few before mailing it out the other day - the lighting was bad in the AM, but you get the idea.


Wednesday, October 7, 2009

Hex Tarp

Here are a few images of the Three Season Hex tarp.  This one is actually 1' wider on the outside edge than my stock model, and weighed in at 14.6oz with the stuff sack.


Sunday, October 4, 2009

New Website

Backwoods Daydreamer Tarps are beginning to take off, so I thought it was time for a better way to promote them.  Head on over to www.backwoodsdaydreamer.webs.com to check out the new format.  The site is still very much under construction, so check back often for updates.  The store is soon to be online and you will be able to pay with paypal right from the site (so long as it works properly).  You'll notice some changes in the tarp names, as well as some other things, like all tarps coming standard with D-rings now. 

.webs.com is a free website (much like this).  I know it's not ideal, but I am using it for Backwoods Daydreamer Gear because I want to keep prices down as much as I possibly can.  Please let me know if there's something wrong on the site and if there is something you'd like to see added.

I'll continue to keep this blog active until I am satisfied with the new blog which will be on the new site.  That may take a while. 

Thanks,
  Scott

Friday, October 2, 2009

Lows in the 40's

My Church held a Men's Advance (not a retreat, we ain't retreating from nuthin') last weekend out in western Maine up on Blueberry Mountain.  It was a fantastic weekend and I always enjoy Blueberry Mountain Bible Conference Center.  Bob and his wife who run the place are a couple of the best people in the world. 


View of Webb Lake, looking down the mountain from the Lodge.  It's like this every AM.

Three of us decided to spend Sat. night hammocking rathern than in the nice, toasty warm rooms.  The lows were supposed to be in the 40's with rain by early morning.  Since I"ve sold out of tarps I had to use my old, old DWR (Durable Water Repellant - a far cry from "waterproof").  It worked great, by the way. 


It was also an opportunity to test out my homemade underquilt.  Fourty isn't all that cold, but I'm an extremely cold sleeper so my gear has to be up to the task to give me a comfortable night.  Good news, I was snuggly warm all night - and slept way better than the previous night on a bunk bed (and much better than on my bed at home for that matter). 


The underquilt was basically free.  I had bought a really crappy sleeping bag for the zipper (it now separates the bugnet on my latest hammock).  I payed less for the whole bag than it costs to purchase just the zipper.  So I cut the bag in half, bound the cut edges and added some suspension lines - and had two underquilts.  They're nothing you'd want to take backpacking (2lbs apiece, and fairly bulky), but for $10.00 for the pair of them, I was pleased.


Sunday, September 20, 2009

Stuff Sack

I've been searching around for the right supplier for silnylon as I sell more and more tarps.  A really great salesman was kind enough to send me some samples for free so I could play around with them and get a feel for their different types of sil.  So I made some stuff sacks with Ultrasil (red) and Skylite (blue).  Both are nice fabrics with similar applications, and coated both sides.  The weight's were no different from each other, but the skylite feels a little thicker (must be the type of coating).


I plan to seam seal one of each with a thick layer of silicone and give them water tests next. 


A simple stuff sack is pretty easy to build yourself.  Here is the way I do it.  Note: the drawing is for a double ended stuff sack ("black bishop sack"), just sew the bottom closed like the side if you want a standard stuff sack like the ones pictured above.  "Black Bishop" sacks are nice for tarps or hammocks so you can leave the suspension loops hanging out each end - just put one end up, and pull the rest out of the bag on the other end, leaving the bag on the suspension line.

I also like to add a loop of 3/8" gross grain so you can hang it upside down (this way if it's in the rain the opening is down and it won't fill up with water).

A. Cut out your rectangle of cloth - twice as wide (+1") and as tall (+2") as you want the bag to be.
B. Fold corners as shown and roll hem, this gives you a nice finished channel for the draw cord. 
C. Sew the end closed, turn inside out and sew a line parallel to the one you just did, about 3/8" away (this gives a finished edge on the inside so it can't fray).  Add a drawcord and cordlock and you're in business.

Tuesday, September 15, 2009

Custom Tarp

This is the most recent tarp I've been able to put together.  It was a custom build for a great guy I met at a local rope/tarp/tool shop.  I went in looking for some guy line for tarps and in talking it turns out we have a lot of the same interests in getting out into the woods.  He introduced me to Survival Topics (check it out if you have a chance) and even gave me a firesteel and striker.  Great guy.

So, here's the tarp.  It's a 9'x6'6" with 1.1oz coated ripstop nylon - in woodland camo. With stuff sack it weighs in at 9.4oz.  It's big enough for hammocking, but this one is going to be used for the ground.


Saturday, September 5, 2009

Moxie's New Friend

We've got two large dogs.  They sleep in the bathroom (we have a huge bathroom) and the air can get a little thick in there with the two of them so we often have the window opened about 4 inches.  This evening as my wife and I settle down to relax we hear Mia (the Rottie/Dalmation mix) freaking out - which is not an uncommon thing - but this time it's a bit more than usual.  I go check it out and find the window has been opened to about a foot and a half and no Moxie in sight (the black lab).  He had knocked out the screen and escaped.

Moxie's not the sharpest tool in the shed.  He saw what he thought would be a nice new friend sauntering by the bathroom window.  Turns out they weren't going to be close friends.  I'll let pictures say the rest.


These pictures do not do it justice.  He was in a rough spot - and his freaking out only made it worse.  He's on his way to the vet with my wife now, and Mia is very concerned here, she won't stop whining. 

The worst of it is, I bet he'll do the exact same thing again given the chance.

Thursday, September 3, 2009

Sales

I've been building gear for over a year now, and because I enjoy it so much I tend to make a good bit more than I need.  Eleven hammocks and six tarps, a bivy sac, two underquilts and more stuff sacks and stoves than you can shake a stick at - and I got to the point where I decided to do some extra work and turn this hobby into a self-sustaining project.

I'm testing the waters with tarps.  I've just sold two 11x10 silnylon tarps and will use that small profit to purchase material to make more.  If those sell (and I've already got orders pending), then I'll use that profit to purchase even more material and seriously look into starting a small cottage industry.  It's exciting, a lot of fun, and a bit scary, but I'm doing something I love and if I can find a way to be at least moderately successful and continue to build quality outdoor gear, I will.

I still consider myself new to this, I'm slow (it's a one man operation), and I won't be pumping them out en masse, which is why I am keeping the prices very very low compared to the competition.  And I don't want to hurt the competition either - there are some very good tarp builders that support the Hammocking community (no, you don't need to hammock to utilize tarps - they work for ground dwellers just as well) and I will continue to point people their way.  But if you find yourself in need of a super lightweight tarp, toss me an email and we'll go from there.  Right now I am not in business, but likely headed that way. 

The one pictured here is my 11x10.5 Oversize tarp.  There's a write up on it's design a few posts down the list.  I sold the prototype for $85.00 (it was used once).  Subsequent versions will likely go for $95.00 shipping included to the cont. 48 states.  Prices are not all worked out yet.

I also sold an 11x11 tarp, a prototype, for $80.00.  Subsequent versions will be closer to $85.00 shipped. 

These two were both cat-cut (catenary curves on all outside edges between tie-outs).  It's a fairly grueling process, but it makes the tarp pitch nice and tight - no flopping around in the wind.  You can get a good pitch with rectangular tarps as well, just not quite as nice.  On both of these tarps they are sized so that the ends can swing in to seal out the nasty weather.  These pictures do now show it fully closed (needs a slightly steeper pitch to do so).  

I'll post again with available tarps, colors, and pricing when I get things together.  To any and all - thanks for your interest.  And if you want to build your own feel free to toss me questions, I'd be glad to share what I know.

Tuesday, August 25, 2009

TRIP REPORT: Donnell Pond

On the day before our trip, a couple friends and I went to scout out our intended camp location on Tunk Lake. It's good we did. This was supposed to be a quick hike in, check it out, and hike back.

Turns out there is absolutely no route to the camp sites by foot, you've got to go by boat. We did get to the sites, by foot - with a compass and map and lots of rock hopping along the shore. Four and half hours of it. We learned what we needed to learn. Tunk Lake is a no-go.

So we went to Donnell Pond, on the southern end at Schoodic Beach. The place is fantastic and if you're ever in Maine for a campout, check it out. Sand is a rarity here in Maine and Schoodic Beach has a great, long, sandy beach with great swimming.

Look... sand... in Maine!

A view down a portion of Schoodic Beach.

It's just a half mile hike down a wide trail to the campsites at the southern end (there are lots more sites that you can get to by boat). This end has four marked sites with picnic tables. We took one with more trees as we had more hammocks than tents.

View of a couple hammocks set up. A Hennessy on the left and my homemade rig on the right.

On Saturday we hiked up Schoodic Mountain. It's a short mountain, only 1000ft to the summit. The remnants of the tropical storm Bill were threatening, but didn't show up until the night. It's a nice, leisurely hike (though some who came would argue that point) with what could possibly have been a nice view at the top. We had a grand view of the fog.
A look down from part way up the mountain. Schoodic Beach is on the right.

Here was our beautiful view at the top of Schoodic Mountain.

The cooksets we made worked out wonderfully. The boys did a great job with being safe and not burning down the forest. Eight people, only one with prior SuperCat experience, firing off these stoves all weekend and nothing terribly dangerous happened... I'd call that successful. We had mac'n'cheese, spaghetti, ramen noodles, oatmeal, and lots of hot drinks.


Here's Joe eating his mac'n'cheese. He'd forgotten silverware so is using his hunting knife. Kids, don't try this at home.

Some mac'n'cheese with hotdogs tossed in.


Just pickin' my teeth after a meal with my itty-bitty camp knife.

On Saturday night the remnants of tropical storm Bill swept through. I learned a valuable lesson. Seam sealing the ridgeline on your tarp actually is fairly important. It was some powerful wind and rain, and the ridgeline right over my head dripped something fierce. I had to get out at 2:00am and adjust the tarp to where the ridgeline wouldn't drip on my hammock. I need to see to that seam sealing asap.

We also had to pack up in the rain. Not my favorite, but it went really well. I've got tarps out to dry right now in my side yard, and need to set up the junk tent that a couple boys used to let it dry out as well. But all in all, a smooth process.

My adjusted tarp so the ridgeline wouldn't drip on me all night. The hammock and I were fairly wet by the time I got this done.

The only real downfall of the trip was our neighbors. They'd been living there for at least a month and a half (14 days is the legal limit here). Social skills were at a minimum with these folks, and one girl had a mouth on here that would make a sailor blush... and no volume control or others awareness. They seemed to relegate thair loud and obnoxious talk to early in the morning and very late at night (midnight to 3am). That, and the pungent smell of marijuana wafting through each evening from their campsite made for some frustration. I think if they spent a little less on the weed and a little more on rent they'd be doing everyone a favor.

I hope folks like that are gone when you visit.

All in all though, a great weekend with the boys.

Monday, August 3, 2009

MAN CAMP

"There will be no electricity. There will be no running water. There will be no 'facilities'. And there will be no whining. This is Man Camp - not pamper camp."

I'm a youth pastor at a church near Bangor, Maine. Each year I take a group of Jr. and Sr. High boys on a short but rugged weekend camping trip that I've dubbed "Man Camp." These are not all boy scouts, and for many of them this is their first experience camping in the real woods (campgrounds do not count as woods). We learn new camping skills and build something to add to our outdoor gear collection.

This year we're building a minimalist kitchen set, and they'll all be cooking their own food for the entire trip. I am so excited! I just got a box of (15) IMUSA 12cm Aluminum cook pots from George at www.end2endtrailsupply.com (great guy, excellent service and shipping!). I felt like a little kid again at Christmas, diving into that box.

Here's the kitchen set the kids will build:
- IMUSA Aluminum Cook Pot, 12cm
- Pot lid (aluminum bake sheet)
- Windscreen (aluminum flashing)
- SuperCat alcohol stove
- Ziploc Twist'n'Loc mug (sm) w/cozy (reflectix)

Two years ago we built survival kits, and last year was soda can jet stoves that run on denatured alcohol. I'm really looking forward to this year. I also put a 35lb weight limit on their packed in gear. Last year it was horrendous how much stuff we carried in. This year we add a slight minimalist element with the weight limit and the cook set.

The kids will be sleeping in tents. Meanwhile, I and a few of the other adults will be snoozing comfortably in the air. Hammock camping has really revolutionized my camping experience, and I'd be hard pressed (pun intended) to go back to the ground. I was converted a couple years ago by a good friend (at a "Man Camp", nonetheless) and since then I've converted a few others. I think, after this trip, many of the kids will all be wanting to build hammocks for next years "Man Camp." If I can find a way to make the project feasible and affordable, that's just what we'll do.

Here's a pic from the trail to Big Moose Pond, where we went last year.

Tuesday, July 21, 2009

Hammock Tarp

I finally built my first hammock tarp with the proper materials. I've built four others, but they were made from 1.1oz ripstop nylon with a heavy DWR (Durable Water Repellent) coating. Those worked alright, but I wouldn't trust them over the long haul or in serious rain.
This one is made from 1.1oz silicone impregnated ripstop nylon. It is an excellent fabric for outdoor gear. Most high end tarps are made from it, along with waterproof stuff sacks and pack covers... rain gear... oh, and parachutes.

This design is thanks to SmokeHouse from Hammockforums.net - I took his design and adapted it a bit.

He took the standard 11x10 tarp and changed it up just a little. The ridgeline is still 11' (ideal length for hammocks), but the total length is 13' at the bottom. This gives it a little extra coverage and allows the ends to be closed off for real stormy weather. The only changes I made from SmokeHouse's design are the catenary cuts. He did a cat cut only on the ridgeline - I left that straight and made cat cuts on all the outside edges.

This design, with 4 tie outs per side, gives plenty of pitching options. It also gives a great deal of dry space for unpacking and cooking in the rain. Pitch it steep with the ends folded in for windy rainy wather. Keep one side down against the wind and put the other side up for a large awning to cook or hang out under.
Catenary curves work to keep the pitch nice and tight. This helps the tarp shed rain and snow better - a loose or saggy pitch can allow water to pool up in spots. It also keeps the tarp from flapping in the wind.
The tie outs are 7/8" gross grain webbing - lightweight but sturdy enough for the task. I find it's best to stay away from grommets, even if only on the webbing. One, they pull lose and destroy the fabric far more quickly than webbing loops. And two, if they come loose or become deformed they could rip and tear your tarp up in the stuff sack. Each tie out point is reinforced with a good sized triangle of 1.9oz coated ripstop nylon.

If you're in need of a tarp there are a number of great places to pick one up. Good tarps are expensive, but you tend to get what you pay for. Check out OES, JRB, Speer, and Warbonnet if you want to buy. There are certainly other sellers, but those are great places to start. Shoot me an email if you want some advice, either for buying or building.

Or you could make your own. Here is the pattern if you're interested. It takes some time, but if you go slow it's not that hard.

Tuesday, June 2, 2009

Hammocking without Bugs

I mentioned that over the winter months I had made 9 hammocks. Building the hammock body wasn't really all that difficult for me. It was figuring out how to add bug netting that presented the problem.

The Hennessy Hammock has the bug net sewn right on with no way to open it up. You enter the hammock through the "birth canal" (I know, not the most pleasant description) opening in the bottom. It's a fantastic design, but I won't be cutting a slit in the bottom of my hammock, plus I'd really like to be able to remove the netting when I want.
NOTE:If you have a Hennessy, and want to remove the netting, these great folks do really great modifications.

I personally have an aversion to adding zippers myself. They're kind of expensive, heavy, are outside of my comfort zone to sew, and can cause real problems if they snag or break - you could be trapped in or out of your hammock, or if it's stuck open you get to feed the mosquitoes and blackflies all night. Many people have had great success with zippers so I'm not saying it's a bad idea - it's just not what I want.

Velcro is a bit more user friendly to me - but it presents problems as well. Velcro is easy to sew, easy to connect and easy to disconnect. But Velcro can be difficult to align properly when it runs along the entire length of a hammock. It is also cumbersome to have to Velcro a side every time you want to get in or out of the hammock. In this, zippers excel and Velcro does not. But as I said, zippers are not an option for me.

There's a method that Risk uses that looked promising to me. He sews a rectangle of netting along one edge of the hammock body and puts a couple pockets along the other edge of the netting. Just drape it over the ridge-line and put some weight in the pockets to keep it snug against the side of your hammock. I had very high hopes. Then I tried it. And I hated it. It works well, but if there's enough weight in the pockets to keep it down - there's also enough weight in the pockets to pull that sewn on side of your hammock up nearly to the ridge-line. It works, but it bothered me.

Then there are bug net cocoons, basically a cylinder of bug net with draw cords on the end, they completely enclose your hammock. Those work, but I could see problems with reaching up to the end of the hammock while inside to close off an end. It would also present a problem if you had to get out of the hammock in a hurry for some reason... I'd rather not be trying to fight my way out of a cocoon of bug netting while a bear is ravaging my campsite.

I want a bug net that is easy to get in and out of without having to re-seal every time. I want to be able to tie it off when not in use, or even remove it completely if desired.

I searched and searched and did not find a solution that would work for me. There's lots of great solutions, but nothing that fit my purpose. That's what is so great about do-it-yourself gear. You can make it to your specifications.


So here it is. I utilized a bit of Velcro, but not where you get in and out, just on the ends, so it's removable. I utilized Risk's system of hanging pockets, but instead of just one side, I put them on both sides. Now you can get in and out of either side - without having to mess with zippers or Velcro. This also gives you lots of pockets for keeping gear right nearby - something Hammockers generally suffer a lack of compared to tenters. The bug net can be detached from one side, rolled up and tied off with some elastic that I put along one edge of the hammock.

Oh - one more great bonus of this bug net. Since it's completely removable - you can use it with just about any end-gathered hammock. All you need to do is sew the proper length of the right side of Velcro (hook against loop) along the outside edges of your hammock. Just be sure to adjust the total length to fit the ridge-line length of your hammock. The easiest way to change the length is just adapt the triangle heights to suit.
Here are the directions if you want to build your own.
- Click to enlarge -


My Nephew enjoying an afternoon rest. This shows the opening tossed over the ridgeline. No connection points in the center, it's just held down by weights (extra gear) put in the pockets. Easy in, easy out.


One more side view, no weight in the hammock.